The Annapurna Base Camp (ABC) trek is a dream for photographers. You can click terraced fields with golden light, dense rhododendron forests glowing in mist, and towering snow-capped peaks playing hide and seek with the clouds. In this article, we have elaborated on the Annapurna Base Camp Trek Photo.
Top Photo Opportunities and Locations
Sunrise and Sunset Panoramas
The golden hours are pure magic in the Himalayas. The soft, warm light makes the snow peaks glow and adds depth to the landscape with long shadows.
Poon Hill (3210 m) – Sunrise
If your itinerary includes the Ghorepani/Poon Hill loop (and I highly recommend it does, for many reasons, including acclimatization), this is a must for photographers. The 45-minute pre-dawn hike is rewarded by arguably one of the best panoramic sunrise views in Nepal. From the top of Poon Hill, you get an unobstructed 360° view: Dhaulagiri and its sisters to the northwest, the whole Annapurna range spanning from Annapurna South, Hiunchuli, Annapurna I, Tent Peak, Gangapurna, to Machhapuchhre and beyond, and even far east to Manaslu on a clear day.
For photography, arrive at least 30 minutes before sunrise – the color in the sky starts long before the sun peeks over the horizon. Often, the first light hits Dhaulagiri’s summit, painting it pink, while the valley is still in darkness. Then one by one, other peaks catch the sun. It’s spectacular. Use a wide-angle lens so you can click the entire scene. You can compose with the crowd of trekkers or the viewpoint sign in the foreground for context.
Also, don’t forget to turn around – sometimes the sky on the opposite side of the sun turns pastel pink and purple (“alpenglow”), which can be beautiful against silhouettes of the crowd or prayer flags. A trick: bracket your shots or use grad filters, if possible, because the dynamic range (bright sky, dark mountains) is enormous. You can combine exposures later so the hills aren’t just black silhouettes (unless that’s the effect you want).
Annapurna Base Camp Trek Photo (4130 m) – Sunset and Sunrise
You are literally in a bowl of mountains at ABC. It’s one of the few places to see stars overhead and massive peaks on all sides. For sunset, the best shots often look west/northwest – that direction catches the last sunlight on Machhapuchhre and Annapurna South. A popular subject is the spire of Machhapuchhre turning golden. If there are wispy clouds around the peaks, even better – they light up too.
Meanwhile, the basin (where the lodges are) will be in shadow, which creates a cool blue contrast with the warm peaks. You can frame something in the foreground – like the sanctuary signboard, prayer flags, or even the silhouettes of other trekkers admiring the view. For sunrise at ABC, you’ll want to be up early (and it will be cold!). The sun rises from the east, so Annapurna I (to the south-west of the basin) often lights up first, followed by Annapurna South, and then Machhapuchhre, which is slightly further east.
One classic sunrise shot is to walk a little north of the lodges (toward Machhapuchhre Base Camp), where you can get a broader view of the ABC basin. You’ll see the ring of peaks gradually illuminating. With a wide lens, try to encompass as many peaks as possible in one frame – Annapurna I’s huge face, tent Peak, Fluted Peak, Annapurna South, etc., maybe even including some of the glacier or the stream in the foreground if you can.
Because the light changes fast, have your camera settings ready beforehand (maybe start at ISO 200, f/8, 1/100 and adjust as it gets brighter). If you get clear weather, the morning light is often razor sharp and contrasty – peaks will cast distinct shadows on each other, which adds drama to the Annapurna Base Camp Trek photo.
Also consider MBC (3700 m) for sunrise if you happen to be there – facing Machhapuchhre at dawn is epic. Another secret: Hike a little above ABC (towards Tharpu Chuli Base Camp) for sunset or sunrise – even going 15 minutes up onto the moraine behind the lodges gives a vantage point looking down at ABC with peaks around. I did that at sunrise – the view of the tiny colored tents and lodges below, dwarfed by glowing giant mountains, tells the story of scale.
Villages and Cultural Moments
The ABC trek isn’t just nature; it’s very much about the villages and people of the Annapurna region. Capturing the cultural side adds soul to your Annapurna Base Camp Trek photo collection.
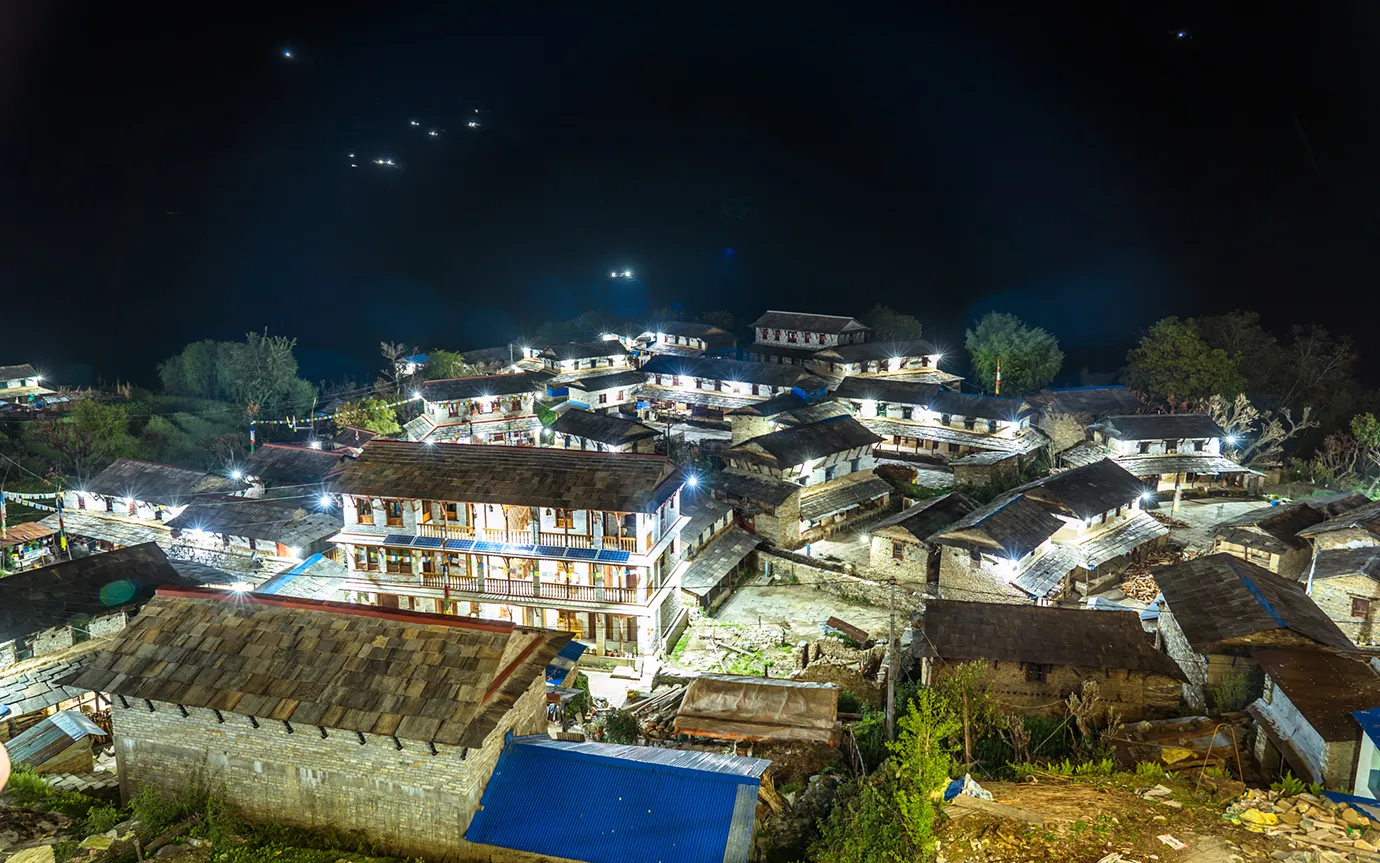
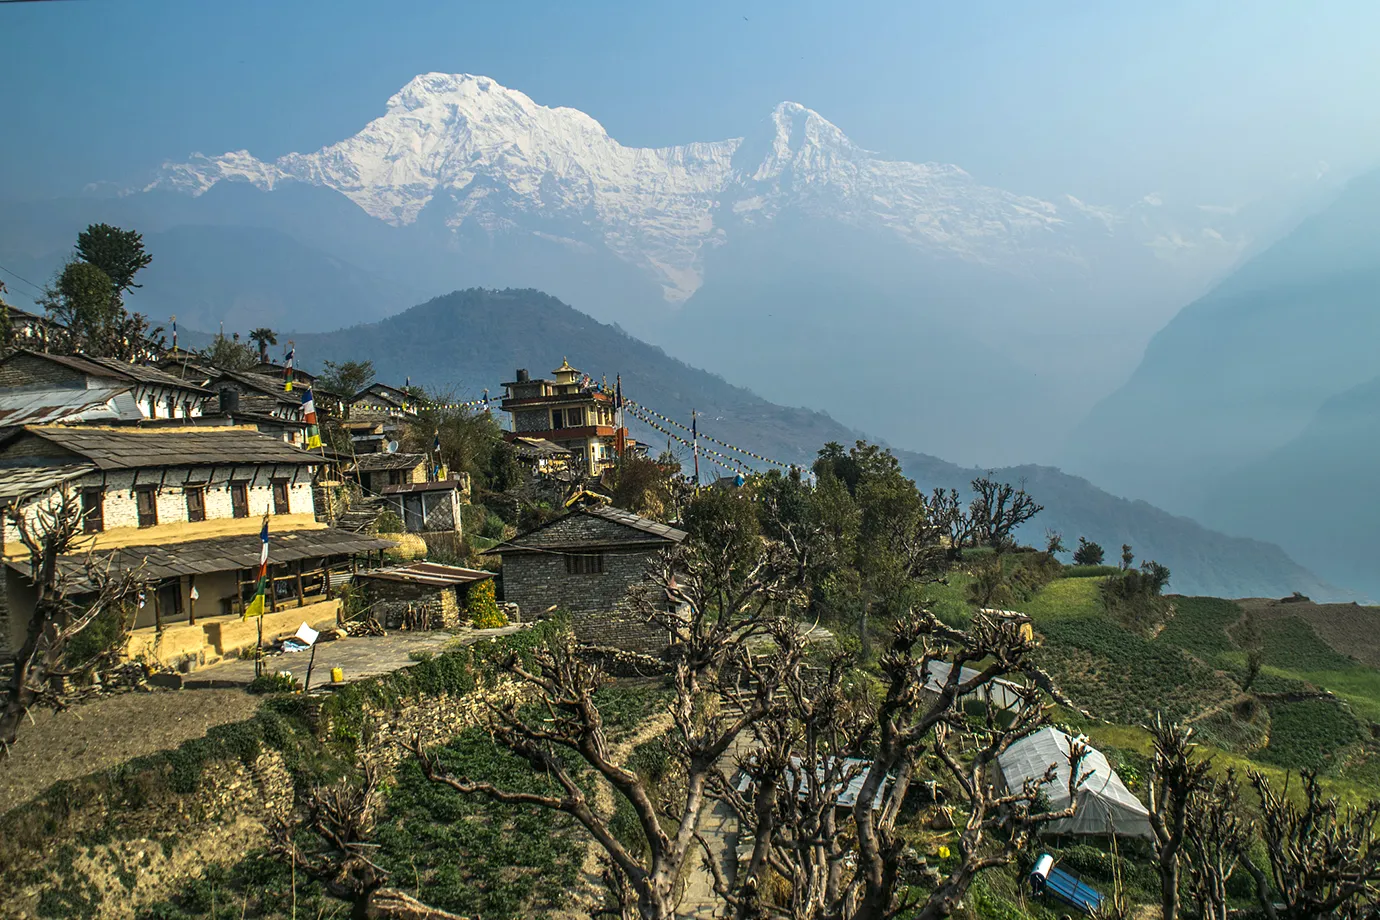
Ghandruk Village
If you pass through (or better, spend a night in) Ghandruk, you’ll find one of Nepal’s most photogenic Gurung villages. Stone slate-roofed houses, neatly terraced fields, and a backdrop of Annapurna South and Machhapuchhre – it’s a photographer’s delight. Early morning in Ghandruk is lovely: often there’s a soft light and maybe a mist clinging to the valley, which adds mood. You might photograph the village coming to life – a Gurung grandmother winnowing grain, or a herd of goats leading down a stone path.
Always ask for permission if focusing on someone – many are happy to oblige. I once got a shot of a Gurung woman in traditional attire standing at her doorway with Annapurna South rising behind her – a favorite cultural shot. Aside from portraits, look for patterns: corn cobs hanging to dry under the eaves (common in harvest season), prayer flags fluttering above a yard, or young kids playing (kids are often eager to pose if you show them the photo on your camera screen after – they giggle).
Chhomrong & Other Villages: Chhomrong is another great spot – it’s perched on a steep hillside with superb views of Machhapuchhre at the end of the valley. One photo idea: from a teahouse in Chhomrong, frame Machhapuchhre through the window or balcony, along with a pot of tea or prayer flags – a kind of “tea with a view” shot that tells the story of trekking life. Also, Chhomrong’s long staircase, though a pain to climb, is a fascinating subject – you can capture trekkers as tiny figures ascending or descending with the village spread out and green valley around.
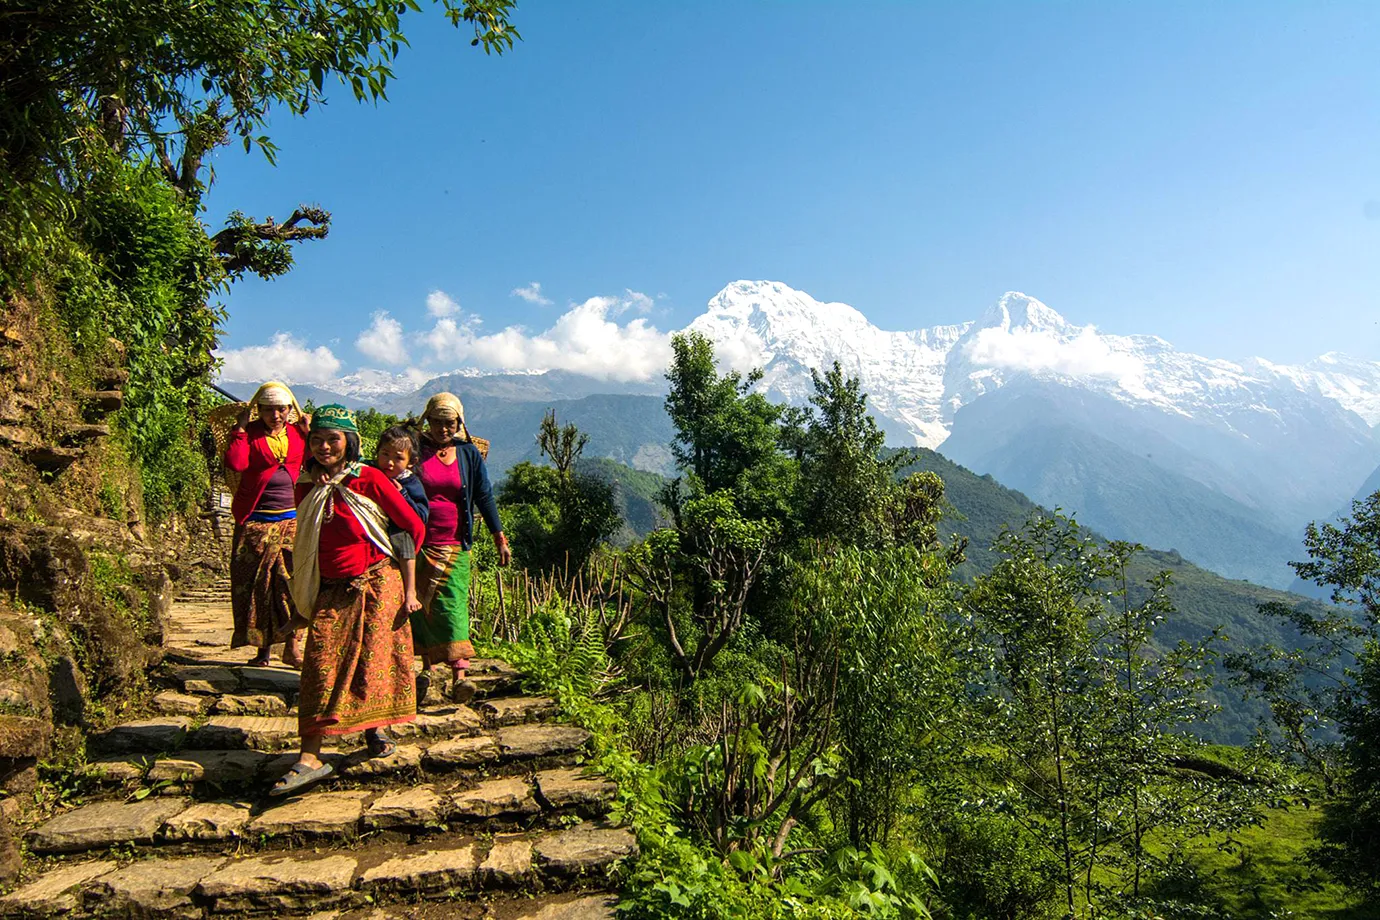
People Photos
Before capturing people’s pictures, interact a bit first. Maybe you stop at a teahouse for tea – you find the owner is weaving a basket or playing with her child. Strike up a conversation (guides can help translate). Often, they’re proud and happy to have their photo taken in that context. Focus on their expressions – mountain people have beautiful, weathered faces that can tell a thousand stories in one portrait. The key is respect: never intrude with a camera in someone’s face without establishing some rapport. If language is a barrier, a warm smile and a gesture to your camera with a question mark works universally.
Festivals or Events
If you’re lucky to coincide with a local festival (Dashain, Tihar, etc.), you might see villagers in traditional dress, or children with tika on their foreheads. These candid shots can be golden. Even outside festival times, familiar cultural sites include mule caravans (a train of mules carrying supplies – very photogenic as they wind along a narrow trail with bells jingling), porters carrying heavy loads with head straps (a reality of mountain life and trekking tourism), and monks or nuns at small monasteries or shrines along the way. Tadapani sometimes has grazing yaks or goats near lodges that shepherds tend – a chance for some pastoral scenes.
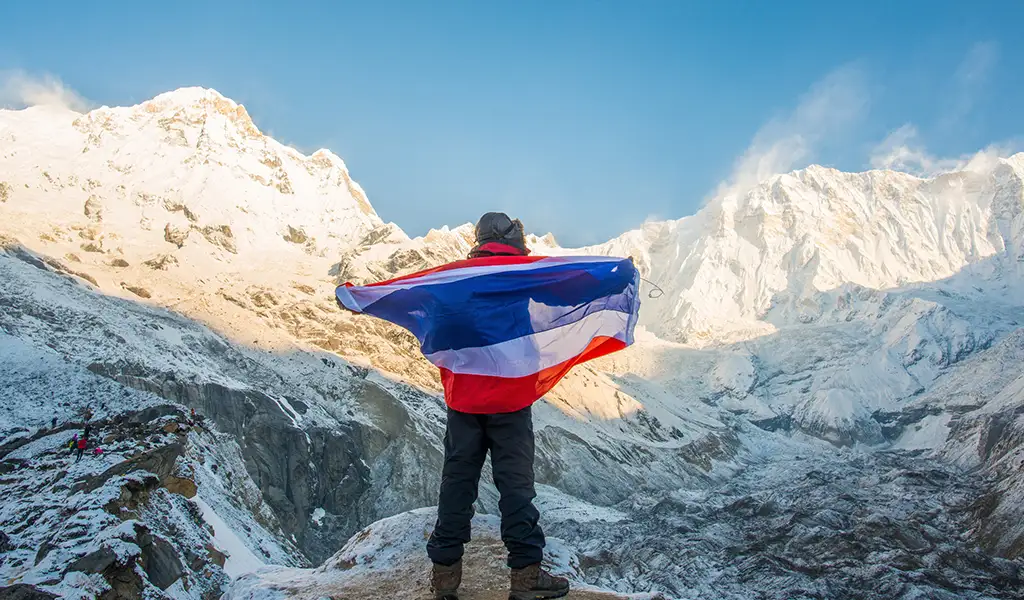
Adding human elements to your Annapurna Base Camp Trek photo provides context and relatability. The mountains are incredible, but a shot of Annapurna with a colorful prayer flag in the foreground or a silhouette of a trekker raising it from a postcard to a story.
Best Seasons and Times
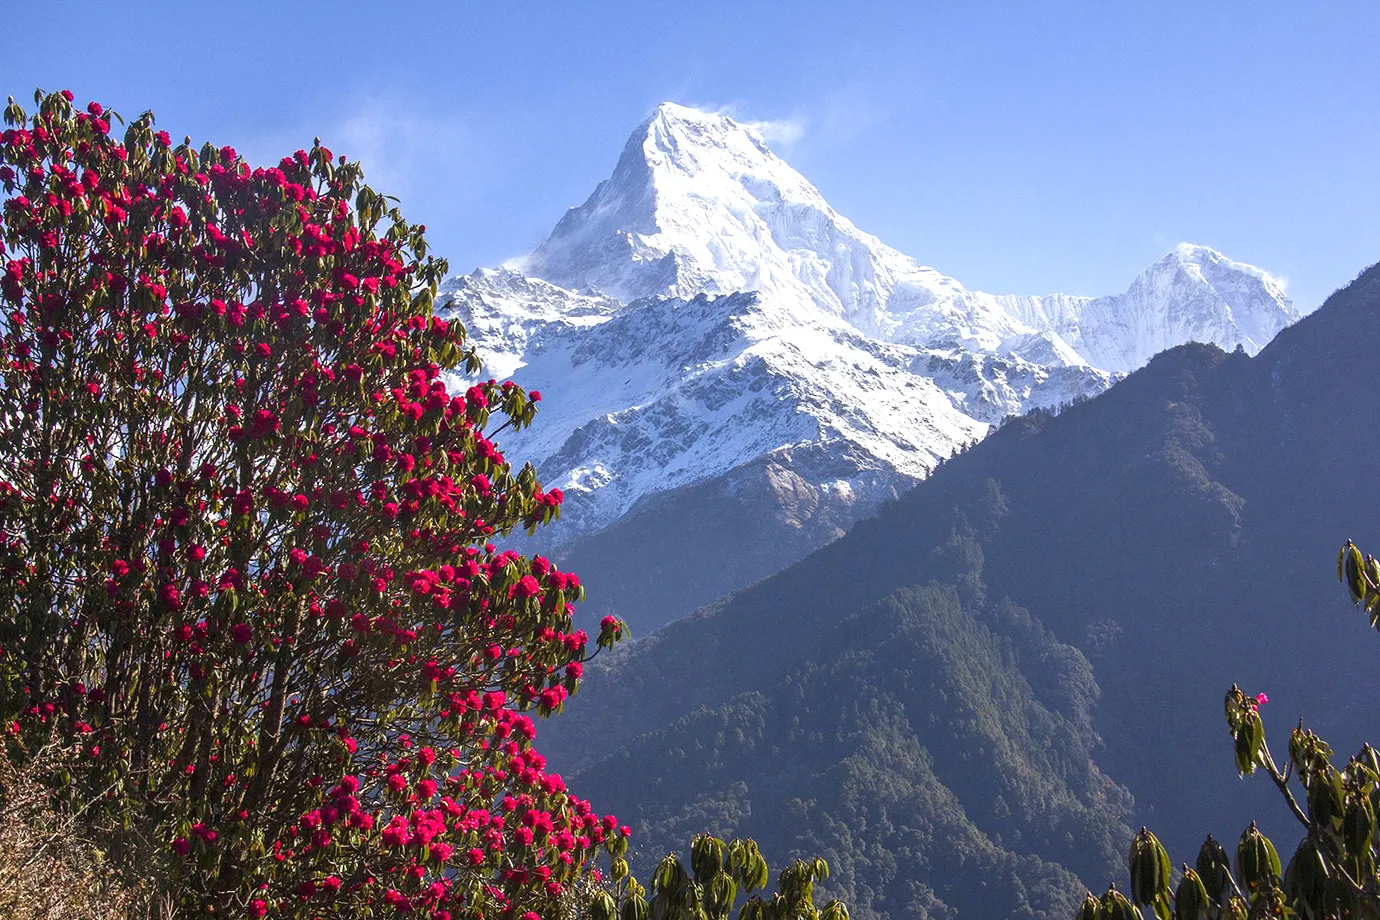
First, think about when to go. The autumn months (late September through November) usually offer clear skies and stable weather, ideal for crisp mountain shots. The post-monsoon air is clean, so long-range photos of the Annapurna range come out sharp. In spring (March through May), the weather is also generally stable, plus the hills burst into color with rhododendron blooms – an excellent foreground for your images.
Spring might have more haze (especially in lower elevations) than autumn, but the flowering forests more than compensate. Winter (December through February), if you don’t mind the cold, can provide stunning clarity and even more snow on the peaks for contrast. The skies can be deep blue and the landscapes draped in snow – gorgeous for photos – but you’ll face harsher conditions and possibly some closed trails.
Many photographers love winter treks for the dramatic light and low sun angle (think long shadows and glowing peaks). Just keep in mind, whatever season, the best times of day to shoot are early morning and late afternoon. The “golden hour” light around sunrise and sunset paints the mountains warmly, adding depth with long shadows in the valleys.
Gear Essentials
Now, let’s talk gear. You can get great shots with a smartphone these days – phones have excellent sensors and even night modes for stars. Carry a DSLR or mirrorless camera if you’re serious about photography. It gives you control over settings and better performance in tricky lighting (like bright snow or dark forests). Ensure it’s something you’re comfortable carrying the weight. Many mid-range mirrorless cameras are relatively light and compact.
Lenses: If you have interchangeable lenses, I recommend a wide-angle lens (around 16-24mm on full frame, or 10-16mm on APS-C) and a telephoto (70-200mm). The wide-angle captures those sweeping panoramas of the Annapurna Base Camp amphitheater or vast terraced landscapes.
The telephoto is fantastic for isolating a distant peak (say, a close-up of Machhapuchhre’s fishtail tip glowing at sunrise) or compressing perspective (e.g., making the layers of hills and mountains stack dramatically). Trekkers often use only wide-angle lenses, but I’ve gotten some of my favorite shots by zooming in – for instance, catching people’s silhouettes against huge mountain backdrops, or the moon hovering near a summit.
Tripod: A lightweight tripod is your best friend for dawn, dusk, and night shots. It stabilizes your camera so you can do long exposures – think of the silky effect on waterfalls or the stars over ABC at night. Night photography in the Annapurna Sanctuary is jaw-dropping because there’s little light pollution – a tripod will let you capture the Milky Way, star trails, or lighted tents against dark peaks. Choose a travel tripod that’s stable enough for your camera but not too heavy. Carbon fiber ones are great if the budget allows; otherwise, aluminum.
Accessories: Bring extra batteries and memory cards. Cold temperatures (like mornings at base camp) drain batteries faster, so bring at least 2-3 spares for a DSLR. You won’t find camera battery types easily in teahouses! Memory is cheap now – carry more than you need; you might be shooting many bracketed exposures, panoramas, or even some video.
A polarizing filter is beneficial for daytime landscapes. Increasing contrast can also help with the haze that sometimes lingers in valleys. Also consider a microfiber cloth or lens wipes – trails can be dusty, and you’ll get some lens fog or dust that you’ll want to wipe off to keep images sharp. If you’re into long exposures, a neutral density (ND) filter helps shoot waterfalls in brighter light – it lets you use a longer shutter without overexposing.
Protection: Keep your gear safe from the weather. A simple rain cover for your camera bag is a must-have. I often pack gear in zip-lock bags or dry sacks for extra protection. Also, consider the dust that can sneak into lenses, so try not to swap lenses in very dusty or windy conditions.
By planning your timing and having the right gear ready, you set yourself up to take advantage of the trek’s visual opportunities. But once on the trail, you also need to know where to point that camera – that’s what we’ll cover next.
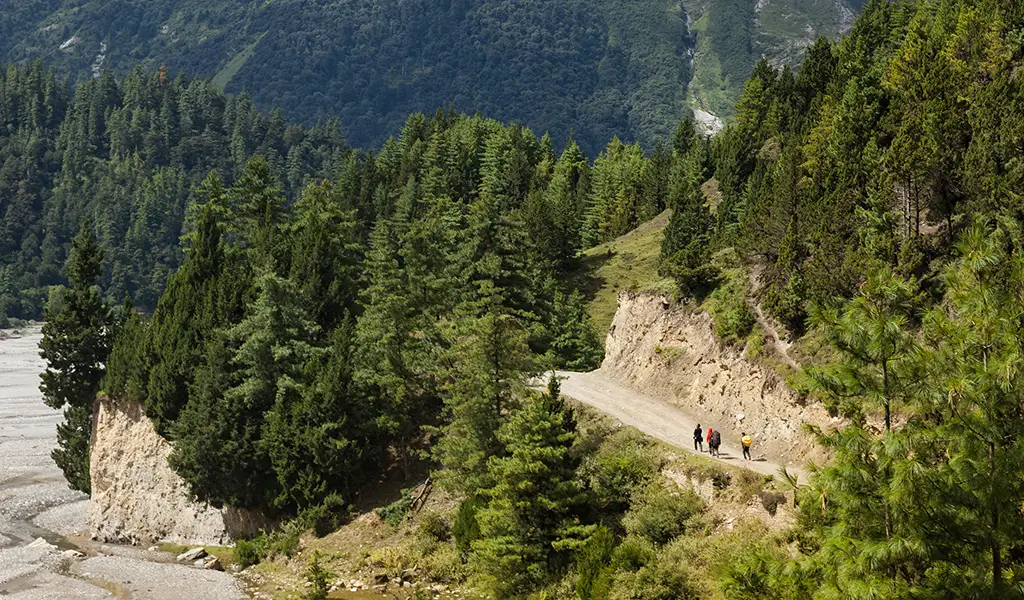
Lush Forests, Waterfalls, and Rivers
Rhododendron and Bamboo Forests
Between Ghorepani and Tadapani, and also descending towards Chhomrong, you’ll traverse dreamy rhododendron forests. In spring, these are bursting with red/pink flowers – fill the frame with blooms and catch a snow peak peeking through in the background, if possible, to juxtapose tropic-looking flora with icy mountains. Even when not in flower, these forests have a fairy-tale vibe: twisted trunks, lichen hanging, sunlight filtering in through rays.
It is perfect for crepuscular rays (“God rays”) of light if there’s morning mist. Expose for the highlights in that case to accentuate rays (you can brighten shadows later if shooting RAW). Also, look for leading lines in forests – perhaps the trail itself or a line of tall trees – and use that to lead viewers’ eyes into the photo.The dense bamboo sections near Bamboo/Dovan have a green tunnel effect; try a low-angle shot (crouch down) to emphasize the height of the bamboo stalks arching overhead. If you have a trekker in front wearing a bright jacket, that can give a focal point and scale (green all around, one red jacket, for instance).
Waterfalls
The Modi Khola valley, especially from Dovan to Deurali, has numerous waterfalls cascading down cliffs. After rain, some become quite dramatic. For photography, if you want that silky water effect, you’ll need a tripod and possibly an ND filter to slow your shutter to 1/4 sec or more (in bright daylight you’ll need an ND, but in cloudy conditions or forest shade you might manage with ISO 100 and f/16).
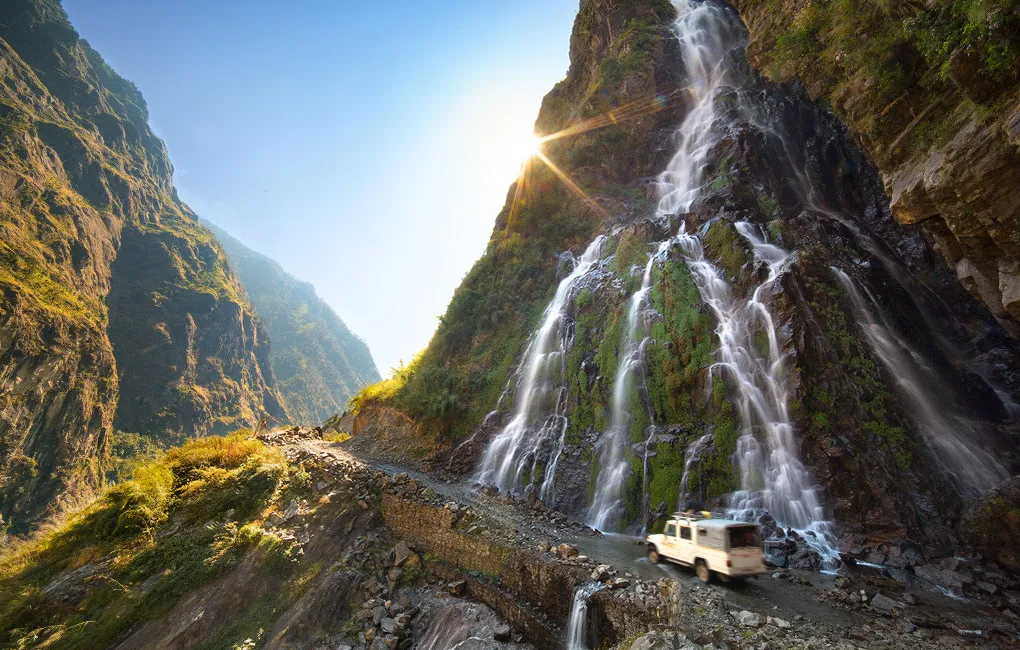
Just be mindful of spray – wipe your lens frequently, or you’ll get spots. Also, think scale: one trick I used was having my guide stand (at a safe place) near the base of a waterfall, so I could get his tiny figure against this huge fall above – that showed how massive it was. Another tip: experiment with both vertical and horizontal framings for waterfalls. Vertical often captures the full plummet, but horizontal can be cool if it’s a wide fall or if you want to include lush jungle context on the sides.
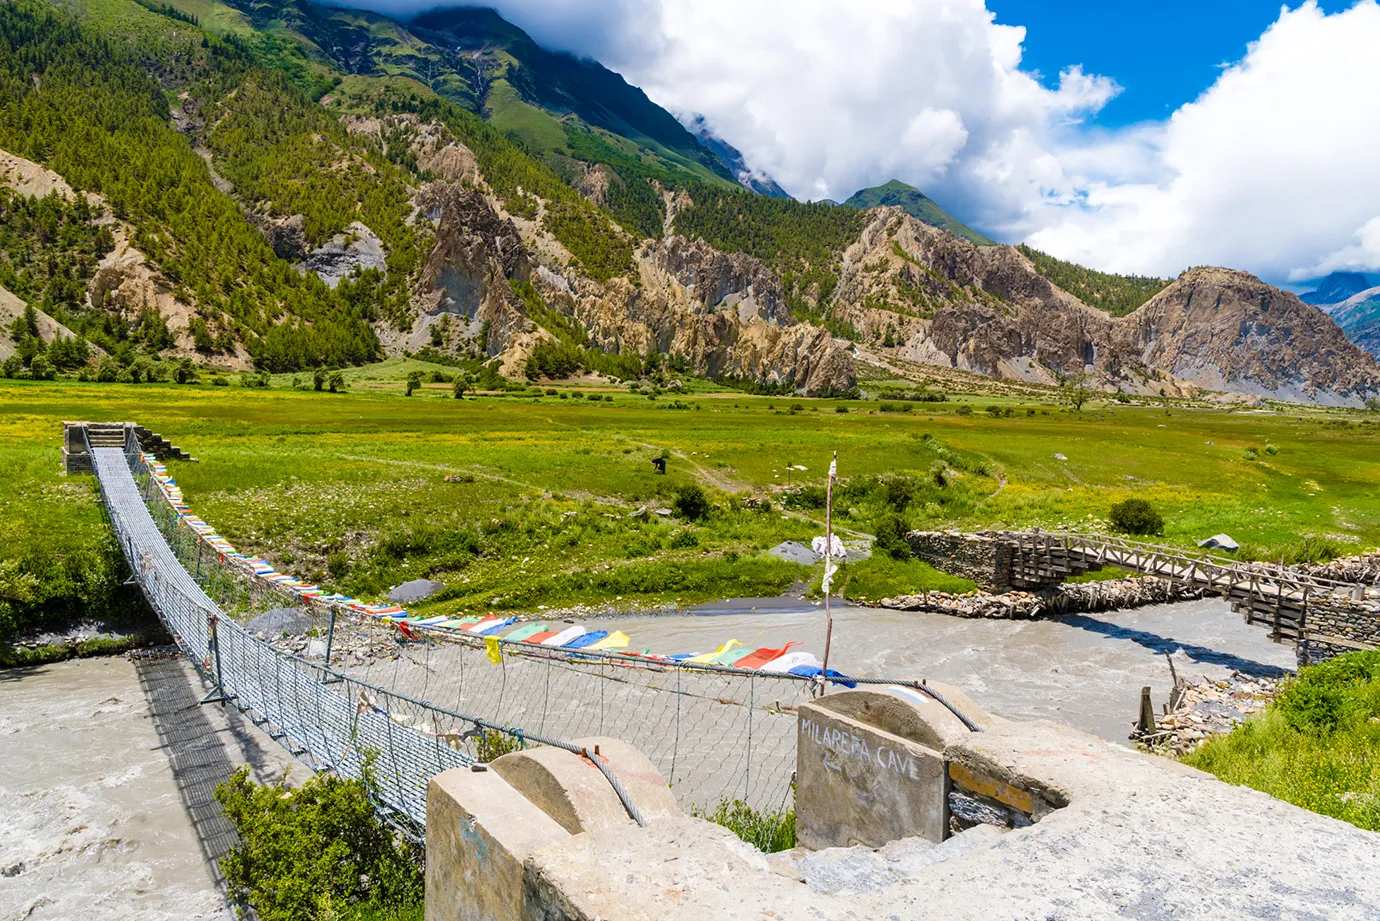
Rivers and Bridges
The Modi Khola itself is an ever-present subject. It goes from a wide boulder-strewn riverbed at Jhinu to a narrower torrent up higher. One classic shot: at Jhinu Hot Springs, if you wander upstream from the pools, you can capture the milky-blue glacial river, with maybe some trekkers soaking in the pools to the side (keeping them small in frame so the river dominates). Further up, near the Himalaya Hotel or Deurali, the river flows in S-curves with stark cliffs on either side – these curves make great compositions (leading lines again).
The many suspension bridges on the trek also beg to be photographed. When someone is crossing, the bridge’s cables form converging lines – that perspective can draw viewers right into the action. Try standing at one end of the bridge and shooting as a line of mules or a person crossing – you’ll get the bridge framing the subject and depth to the shot.
Another idea: drone photography (if you have a drone and permit, etc.), then overhead of a suspension bridge with the river far below can be breathtaking – but drones have complicated usage rules, so check local regulations; many parts are inside the Sanctuary where drones might be frowned upon due to wildlife.
Minor details: A dew-soaked spiderweb glinting in morning sun, interesting bark patterns, bright red rhododendron petals carpeting the trail, or icicles hanging from rocks in winter. These detail shots can add variety to a travel album (not every shot has to be a sweeping mountain shot). For example, I once got a lovely shot of a single rhododendron bloom with Annapurna blurry in the background – it gave a sense of place and a pop of natural color.
High Alpine Landscapes at MBC and ABC
Machhapuchhre Base Camp (MBC)
This spot has a dramatic view of Machhapuchhre’s south face. In the afternoon, the lighting often hits it from the side, revealing all the ridges and textures. You can compose from MBC such that the trail or small streams from ABC lead the eye towards Machhapuchhre. I also recommend walking a bit above the MBC lodges onto the ridge that leads to ABC – then turning around to photograph MBC itself with Machhapuchhre looming above.
The cluster of tea houses against such a formidable peak tells the story of human vs mountain scale. If you catch a clear night at MBC, try astrophotography: a shot of Machhapuchhre with the Milky Way above it is possible (in spring months, the Milky Way core rises in the east a few hours before dawn, roughly above Machhapuchhre if shooting from MBC toward it).
The Sanctuary Amphitheater at ABC
You’ll probably want to capture the 360° panorama. While it’s hard to do justice to Annapurna Base Camp in a single photo, consider shooting a panorama (multiple overlapping shots stitched together later). Stand in the middle of the basin and slowly pan from Machhapuchhre, across Annapurna, to Hiunchuli and back. On a DSLR, manual settings and overlap ~30% each image for best stitching later. Some cameras/phones do automatic panoramas – use those as quick captures, but they sometimes distort tall peaks.
Another pro-tip: include some foreground in those amphitheater shots. Foreground could be a ring of prayer flags (there are some just past the lodges on a little hill), or an interesting rock, or even the icy glacial pond if it’s melted some (at times of year, there’s a shallow lake that reflects mountains – search around, as that reflection shot can be gold). Early morning often has still air for reflections; I’ve gotten a wide-angle reflection of Annapurna I in a meltwater pool near ABC that was pure luck and pure joy.
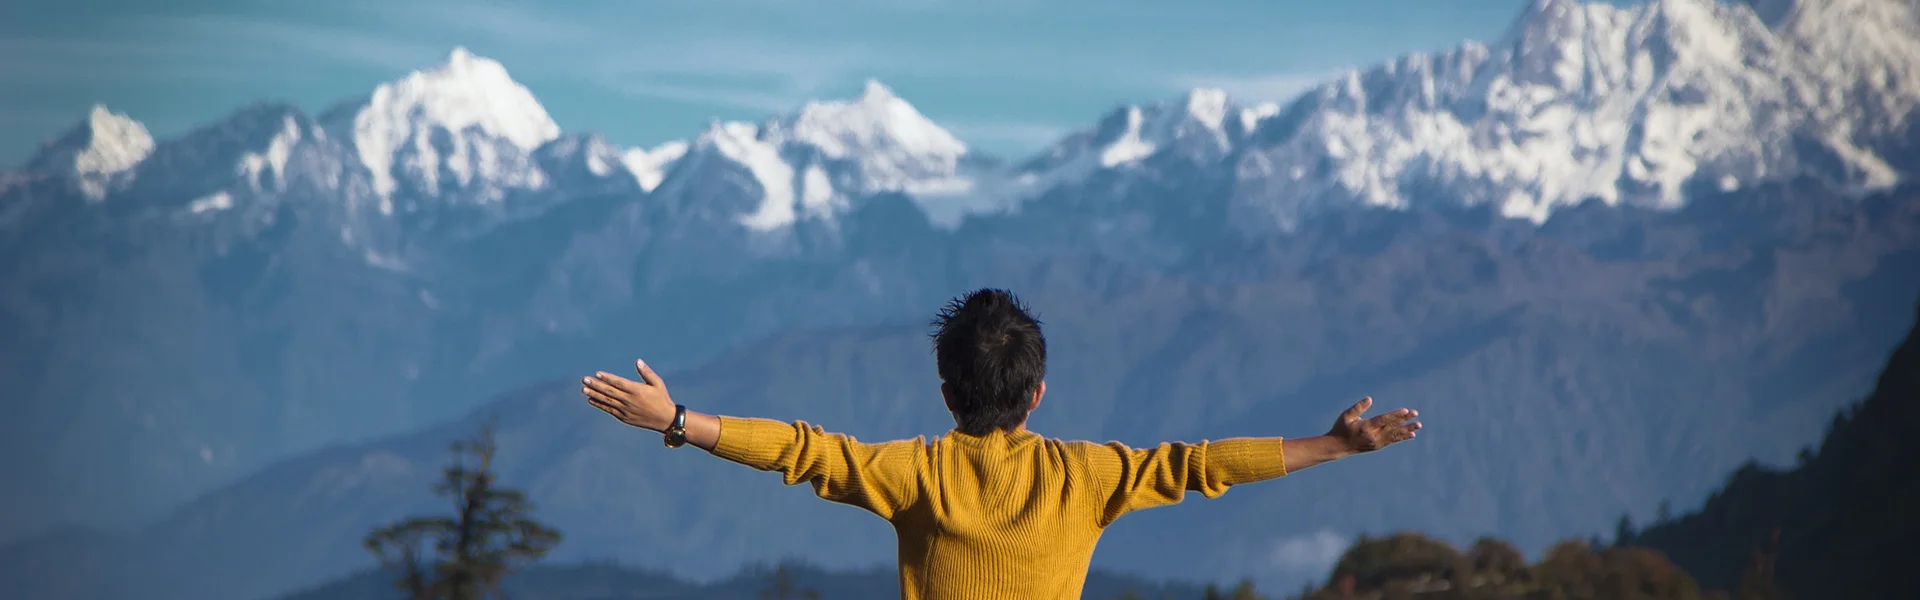
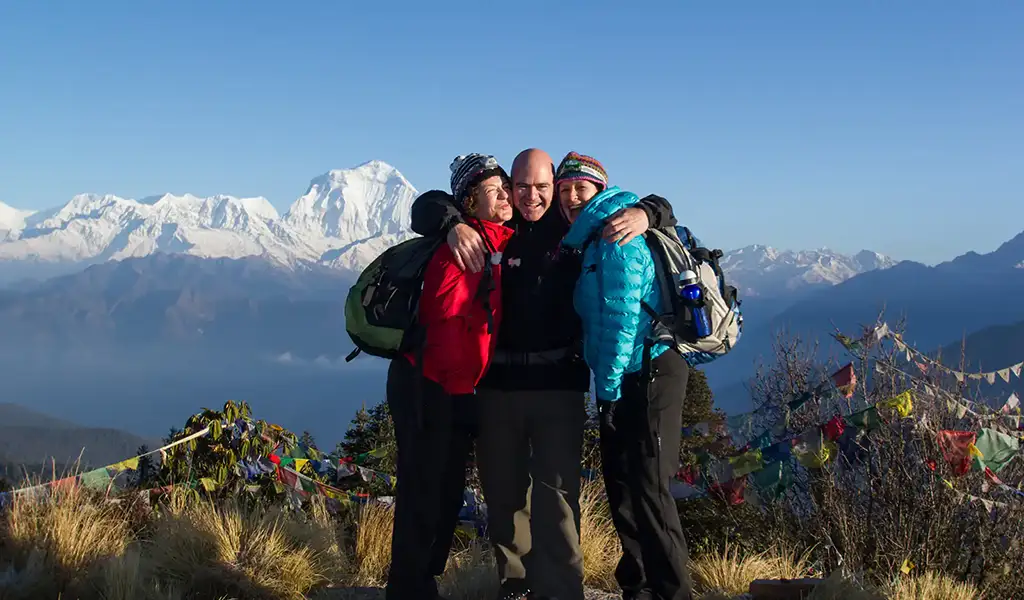
Human element at ABC
Don’t avoid capturing fellow trekkers’ emotions at base camp. Joy, relief, fatigue – whatever is on people’s faces when they finally reach the goal. A candid shot of your friend raising their arms with Annapurna I behind them, or a group hugging in celebration by the sanctuary sign, can be powerful. For a lighter photo, you might do the classic jumping shot (if you still have energy to jump at 4,100 m!). I once asked our whole group to line up and jump simultaneously, with Machhapuchhre in the background.
It took a few tries, but the result was fun. Dusk and dawn also allow for lovely silhouettes. For instance, at sunrise, I positioned a person such that the sun was peeking next to their profile – giving a starburst effect – and the mountains behind lit up softly. Silhouettes of a line of prayer flags against a pink sky also make a great minimalistic shot.
Composition and Technique Tips
Now that we’ve covered where and when, a few quick tips on how to frame and expose:
Framing with natural elements
Use prayer flags, doorways, and trees to frame your shots. For example, at villages, I often shot through the open window of a teahouse – inside, maybe you see a trekker sipping tea, outside the massive mountain. Those frames give a sense of scale and context. In the Sanctuary, you might use the stone cairns (little piles of rocks) as foreground interest with mountains beyond. Also, at places like Poon Hill, maybe frame Dhaulagiri through the silhouette of a pine tree to add depth.
Perspective and scale
The Himalayas are gigantic. To convey that, include a human or animal for scale. A tiny trekker against a giant glacier wall makes the point. Also, try different angles: climb a small hill and shoot from above (like capturing a winding trail with trekkers below), or get low to the ground (makes foreground flowers big and mountains towering behind). Changing perspective can yield unique results from a popular viewpoint.
Leading Lines: We mentioned trails and bridges as leading lines. They draw the viewer’s eye through the image to a point of interest (e.g., a trail leading up to a distant Machhapuchhre in frame). Whenever you have a curving river, a series of trek steps, or even streaks of clouds, compose so that those lines start at the bottom or the side and flow into the photo. It adds a sense of journey to the image.
Exposure Challenges
Snow and bright sky fool camera meters – they tend to underexpose (make the scene gray) because it’s so colorful. Don’t be afraid to dial in exposure compensation of +0.3 to +1 stop when shooting much snow (check your histogram or image replay to see if it looks too gray). On the other hand, sunrise/sunset has extreme contrast – the sky is bright, but the ground is dark. You might use bracketing (take one photo exposed for the sky, one for the ground, merge later in HDR) or use a graduated ND filter (dark on top, clear on bottom) to even out exposure.
Night photography
At ABC or MBC, try it if it’s clear. Set your camera to manual: e.g., 20 seconds, f/2.8 (or widest your lens allows), ISO 3200 as a starting point. Use that tripod, and perhaps the camera’s 2-second timer or a remote, so you don’t shake it pressing the shutter. You might capture the glow of tent lights against a backdrop of stars above Annapurna. If the moon is out, the scene will be surprisingly bright – you could get a photo of snow peaks lit by moonlight (they look almost like daylight, but with stars).
On fabulous night idea: light painting – briefly shining a flashlight on something (like the base camp sign or a close peak) during the prolonged exposure to illuminate it. But make sure not to disturb sleeping trekkers or point lights at lodges.
Backup photos
I like to take some panoramas and videos to capture the whole range (as mentioned) and short video clips to remember the ambiance (rivers or prayer flags flapping, etc.). Even if your primary focus is photos, a few multimedia snippets enrich your memory collection.
Post-processing
Don’t worry if your images on camera don’t match what your eyes saw in terms of dynamic range or contrast – cameras have limitations. In post-processing (Lightroom, etc.), you can often pull details out of shadows (mainly if you shot RAW). Just be careful not to overdo it – the mountains are dramatic enough; usually, minimal adjustments for contrast, a bit of sharpening, and maybe a graduated filter to darken the sky (if not using one on the lens) are enough. If you do astrophotography, edit to reduce noise and enhance star visibility.
Above all, while chasing a great photo of Annapurna Base Camp, remember to enjoy the moment. Sometimes, put the camera down and soak in the view – it is fulfilling and might even help you compose better shots once you’ve absorbed the scene without the viewfinder. Talk to locals and laugh with fellow trekkers. Those interactions can lead to more genuine photos when you pick up the camera again.
The Annapurna Base Camp trek offers endless visual delights. You’ll get an unforgettable collection of Annapurna Base Camp trek photos with careful planning, the right gear, attention to detail, and creativity. Happy shooting!