You must know an essential update on the Annapurna Circuit Solo Trek. Since April 1, 1013, the Nepal Government requires every trekker to have a licensed guide. You can no longer trek independently without a guide in the Annapurna Circuit. It doesn’t mean you cannot have a personal adventure; you need to hike with a licensed guide. However, this rule hasn’t been strictly implemented.
Many trekkers still choose to do the Annapurna Circuit Solo Trek. A private guide lets you set your own pace and schedule. You can take extra time at a viewpoint, begin the trek late or early, and trek at your own pace without consulting with a group. Trekking with just one guide also provides space for reflection and quiet moments in the Himalayas. Trekking with a guide still feels like a solo trip. The guide will help solo trekkers navigate the Annapurna Circuit smoothly.
Is Solo Trekking Safe? (Understanding the Guide Rule)
Nepal introduced the rule for compulsory guides mainly for trekkers’ safety. Too many individuals would get lost, suffer from altitude sickness with no one to assist, or get into accidents in isolated places in the past. The government hopes to cut down these risks and ensure anyone in trouble has immediate support by mandating guides.
Why the rule matters: The Annapurna Circuit mostly has rugged and remote terrain, which is not easy to navigate. The trails may be challenging to follow. Altitude sickness is another danger. It can escalate quickly, and if you don’t get help, it might even be life-threatening. Having a guide means you won’t have to face these challenges alone.
How your guide keeps you safe: Hiring a guide adds a guardian and a local and trail expert to your trek. Guides know the trail conditions, present conditions, and the best detours. It saves you from wrong turns and wasted energy. Guides also pay attention to how you’re coping with the altitude and spot early signs of it. In case of illness or injury, guides can provide basic aid and arrange evacuation. They know how to get help quickly, even in areas with limited connection.
Pre-Trek Planning and Logistics for Annapurna Circuit Solo Trek
Permits: You need an Annapurna Conservation Area Permit (ACAP) and a Trekkers’ Information Management System (TIMS) card. Since you have a guide, they will arrange these permits for you. Usually, if you book the trek and guide through an agency, the agency will handle the paperwork for you. You need to send your passport details and a couple of passport photos so your agency can arrange these permits for you. Your guides will carry the licenses for you and present them at the checkpoints. The authorities no longer issue the mandatory TIMS card to independent trekkers, so you must arrange a guide before obtaining permits.
Choosing the right guide: Your guide will shape your entire trek, so it’s better to take time and find a reliable guide. Ensure your guide is from a government-registered trekking company so they are certified, insured, and accountable. Don’t be shy about interviewing your potential guide. You can ask them how often they’ve completed the Circuit and whether or not they’ve worked with solo trekkers. A guide used to handle groups may have a different approach when handling solo trekkers.
Discuss your preferences before the trek. You may want a slower pace; photograph stops, or a side trip to places like Tilicho Lake. The best guides will adapt the plan to suit your interests. Guides are fluent in English. If you have a preferred language, communicate it with the agency. Good communication makes the trek more enjoyable and safer.
Budgeting for a Solo Trek: Trekking with a private guide costs more per person than joining a group. It offers flexibility and a high personal experience at a higher price. You need to pay about $25-30 to guides every day. It usually covers the guide’s meals, lodging, and insurance. It might differ in different agencies, so confirm the details before the trek. Permits cost about USD 25 and USD 10 for ACAP and TIMS, respectively. Sometimes your package covers these.
A basic teahouse costs $3-10 per night, and meals cost $5-20 each, depending on the altitude. Prices increase with altitude. You’ll get a single room as a solo trekker, but you might have to share it during the busy season. Guides usually help secure private rooms even in peak times. Flying from Jomsom to Pokhara is quicker but costs $12,0 while jeeps/buses cost about $20-30 per person.
You should also invest money in hot showers, WiFi, battery charging, snacks, and tips. Tipping your guide is almost an unwritten rule for trekking in the Himalayas. You may tip about 10% of your total guide fee. Plan your finances carefully so you don’t get surprises on the trail. While more expensive, trekking independently with a guide created a more personal trek.
Customizing Your Annapurna Circuit Solo Trek Itinerary
One of the biggest perks of trekking with a private guide is the flexibility. You don’t need to follow a group pace or schedule. You can take a slower day, add a side trip, or spend more time on one spot. You must discuss the side trips with your guide so that you can allocate enough time, arrangements, and permits needed.
Day 1: Kathmandu to Jagat (1,300 m)
Drive from Kathmandu to Besisahar, then continue by jeep to Jagat. You can skip the lower section by road to save time. You’ll arrive by late afternoon. Check into a teahouse, and enjoy your first night in the hills.
Day 2: Jagat to Dharapani (1,960 m)
Your trek officially begins. Follow the Marsyangdi River, cross suspension bridges, and pass small villages. You’ll cover about 15 km in 6 to 7 hours. Because you’re traveling privately, you can set a pace that suits you. You can stop for frequent photo stops or maintain a steady pace. Overnight in Dharapani.
Day 3: Dharapani to Chame (2,710 m)
Walk 5–6 hours through forests and settlements like Timang. You’ll get to trek with the beautiful views of Mount Manaslu. You’ll arrive in Chame, the district headquarters with hot springs.
Day 4: Chame to Pisang (3,300 m)
Today’s trek covers about 14 km in 5 to 6 hours. Pass through the dramatic cliffside “rock tunnel” before reaching Pisang. If you’re up for it, you can hike to Upper Pisang’s monastery for views of Annapurna II.
Day 5: Pisang to Manang (3,540 m)
You have two route options today. You can take the easy lower trail or the more scenic upper path via Ghyaru and Ngawal. Either way, you’ll walk 6–7 hours before reaching bustling Manang. You can enjoy bakeries, shops, and a film in the village movie hall.
Day 6: Acclimatization in Manang
Today is a rest day so that you can adjust to the altitude. You can take an optional short hike to Gangapurna Lake, attend an altitude talk at the Himalayan Rescue Association, or relax.
Day 7: Manang to Yak Kharka (4,050 m)
Today is a shorter day to aid your acclimatization. Hike for 4 to 5 hours in alpine terrain and arrive in Yak Kharka by early afternoon. Thin air begins to test stamina, so take your time.
Day 8: Yak Kharka to Thorong Phedi (4,525 m)
Today is another shorter hike day. Most trekkers finish the day at Phedi (foot of the pass), and others climb another hour to reach High Camp at 4,800. You can decide based on how you’re feeling.
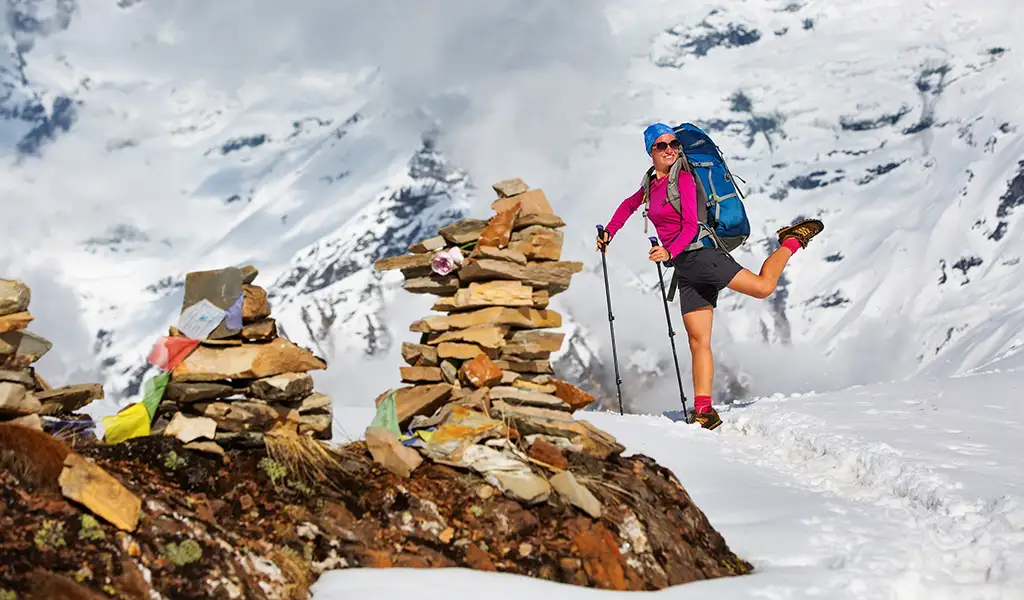
Day 9: Thorong La Pass (5,416 m) to Muktinath (3,800 m)
Today is the most challenging but most rewarding day. Start trekking before dawn and climb for 3–5 hours to Thorong La Pass. You can celebrate reaching the pass at the prayer-flag-draped summit. Then descend steeply to Muktinath, a significant pilgrimage site.
Day 10: Muktinath to Jomsom (2,720 m)
You can either trek for 6 hours on foot or take a jeep for 2 hours by road to reach Jomsom. Stop at Kagbeni, a fascinating medieval-style village at the gateway to Upper Mustang. Arrive in Jomsom for a celebratory final night on the trail.
Day 11: Fly or Drive to Pokhara
Today, you again have two options to choose from. You can take a 20-minute flight, a full-day jeep, or a bus to Pokhara. Flights are more convenient but prone to cancellation due to weather. Traveling by road is longer but more predictable.
Day 12+: Extra Days or Extensions
With more time, relax in Pokhara’s lakeside cafés, go paragliding, or add a side trek such as Ghorepani–Poon Hill.
Optional Side Trips
Tilicho Lake: You can trek to the beautiful high-altitude lake near Manang and add about 3 days to your overall trek. You’ll hike to Tilicho Base Camp, maybe spend a night at the lake at 4,920m, and return to Yak Kharka to continue the trek. While demanding, it is a memorable trip. This is the main advantage of the Annapurna Circuit Solo Trek.
Upper Mustang: While not part of the circuit, you can trek to Upper Mustang from Kagbeni. You can trek to this restricted area if you want a special permit.
Ghorepani/Poon Hill: Instead of ending the trek at Jomsom, drive to Tatopani, then trek to Ghorepani and down to Nayapul. It takes about 3 days and includes some steep climbing.
Essential Tips for the Lone Trekker
One of the best parts of the Annapurna Circuit Solo Trek with a guide is that you can control your pace. If you feel strong, you can continue further on one day, and if you want to take it slow, that’s fine too. You need to inform your guides so you can set your pace deemed safe. Solo trekking means you can trek quietly and peacefully, offering a chance for reflection. You can bring a journal, or some music or audiobooks for evenings, and watch the sunsets. You’ll build deeper appreciation and personal insights.
Being alone doesn’t mean you’re isolated. Teahouses are social hubs where trekkers gather each afternoon. You can have conversations, share meals and stories, or share tips on the trial. Safety and health are your main priority. You must listen to your body, rest, stay hydrated, eat enough, and carry quick snacks like nuts or chocolate. By the end of the trek, you’ll not just cross the high pass but also take in beautiful views and gain confidence in your abilities.
Even with the new guide rule, trekking the Annapurna Solo offers a perfect balance of independence and safety. You can create unforgettable memories while trekking at your own pace. Safe Travels!